


Tutorial: creating Video Samples
Page 1/4 of this article
Author: Blitze

Welcome to the creating video samples howto. In this tutorial we will explain how you can create video samples. The program VirtualDub Mod is an excellent program for creating video samples, but it can't edit more recent file
formats like MP4, MKV or H.264 encodes. An alternative program that you can use to create a sample of video files is AviDemux.
AviDemux is a free video editor designed for simple cutting, filtering and encoding tasks. It supports many file types, including AVI, DVD compatible MPEG files, MP4 and ASF, using a variety of codecs. Tasks can be automated using projects, job queue and powerful scripting capabilities. Avidemux is FREE, and available for Linux, BSD, Mac OS X and Microsoft Windows under the GNU GPL license. It is being actively developed.
- More screenshots in the program's page.
- And full documentation in the Wiki as well.
- Get your copy from the Downloads page.
Steps for preparing sample videos are simple and illustrated in the guide below, you should be able to do it easily.
Creating a sample video file with AviDemux
The program is easy to use - copy a small video to a temp directory and play with it; follow the steps below and you should have no problems.
1. Creating a 'Send To' shortcut to open videos with AviDemux is a time saver.
If you have one installed, you can simply right-click on a file in Windows Explorer, and select 'Send To--> AviDemux2'

A shortcut like this can be made manually - you create a shortuct to AviDemux, and copy it to the 'Send To' folder. Default is 'C:\Documents and Settings\YourUserName\SendTo' in XP or newer Windows versions.
2. Or, just start AviDemux, and use the 'File--> Open' menu, then locate your video file:

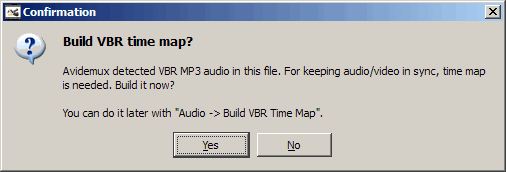
3. Sometimes you will see this screen immediately upon loading the file. VBR detected, build map?
Select the 'Yes' choice, it's needed if the Audio track was encoded with variable rate codec.
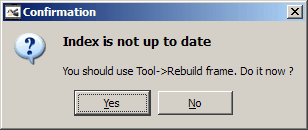
4. Sometimes you could also see this screen when loading the file. Index out of date, rebuild ? Select the 'Yes' choice:
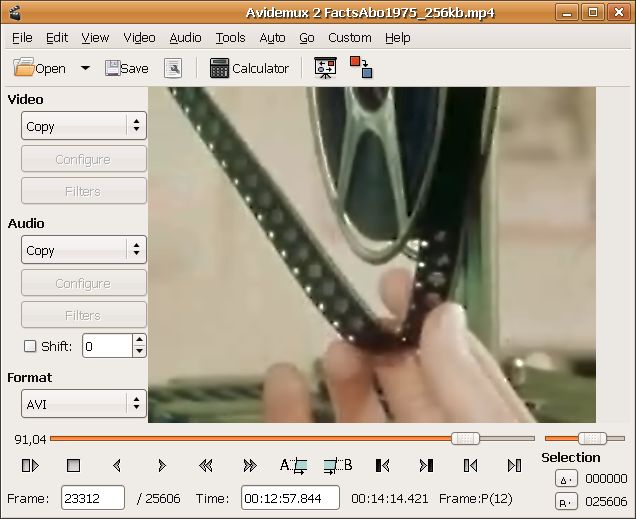
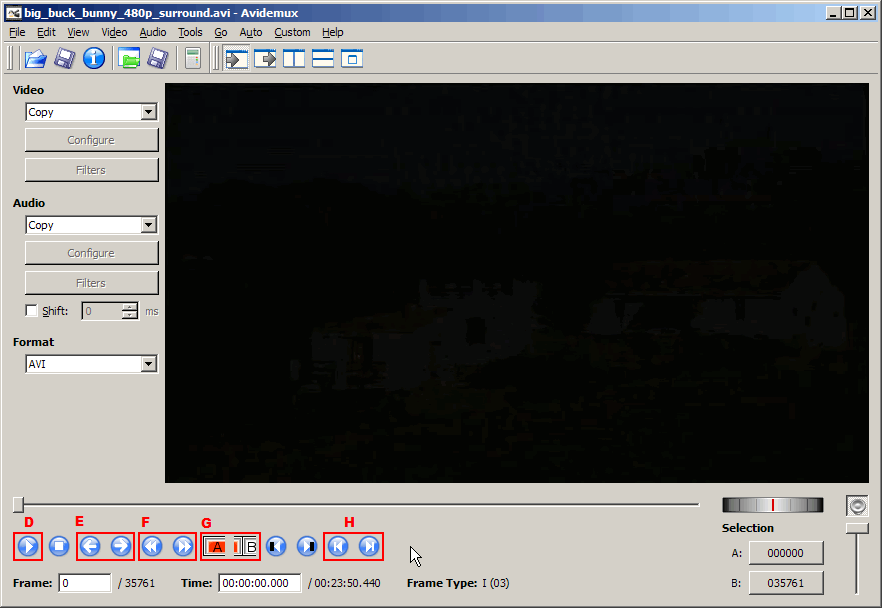
5. In the AviDemux window, we need to select 'Copy' for BOTH video and Sound (we are not encoding a new video, copying the streams is much faster):
You also need to make sure the 'Format'
setting is your desired type of video file - you can select .avi, .mp4,
.mkv and many other types of video in that control box. Use the same
type of video format as your release file.
6. These are the Track Control buttons:
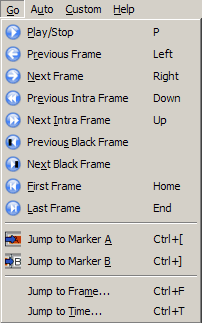
The 'Go' menu has the same icons, each with it's name and shortcuts:
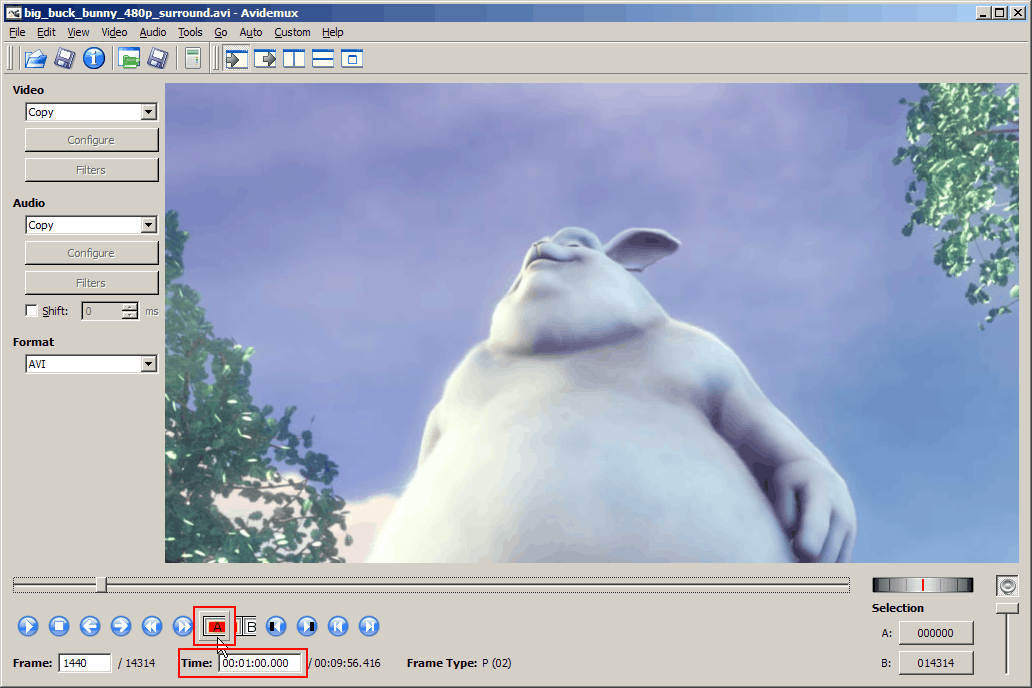
7. Set 'Marker A' to define the end of the sample clip:
 .
.
- We need a sample file about one minute in length. That will be about 10 to 20 MB, depending on the video's resolution.
- Try to cut the video at the end of a scene, not in the middle of music or dialogue.
- You can use the 'Next Intraframe' or 'Previous Intraframe' to get good edit points.
- Those frames are called 'Keyframes' in other video applications, like VdubMod.
- Editing on 'Key Frames' (or Intraframes as AviDemux calls them) avoids audio out-of-sync problems.
- A scene with a 'fade-to-black' ending would be ideal for a cutting point.
8. The crop is now defined - notice the Blue bar in the right side of the track:

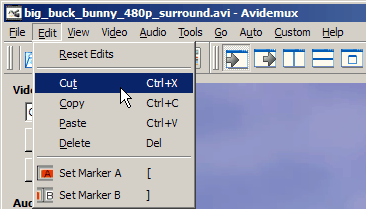
Then, press the Delete key on keyboard. Or use 'Edit--> Cut' or 'Edit--> Delete' menus if preferred.
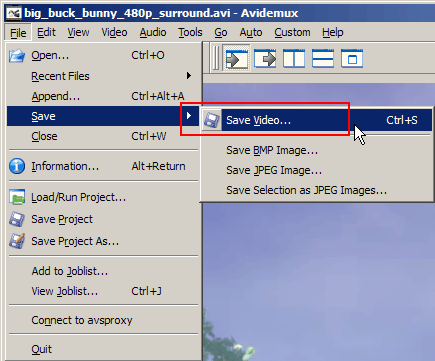
9. Notice the Time duration in the bottom now has shrunk to the sample's duration. Open 'File--> Save--> Save Video' menu.
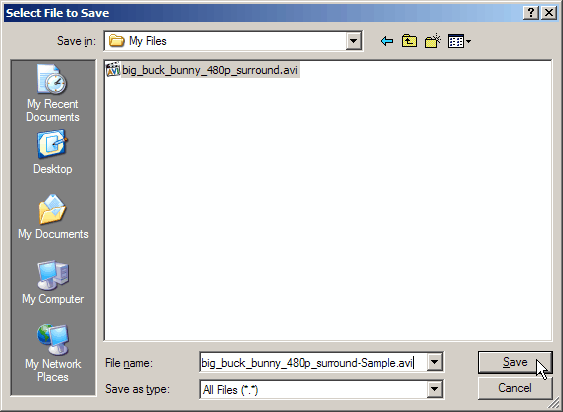
10. Name the sample file the same way as the full video, adding '-Sample.avi' at the end.
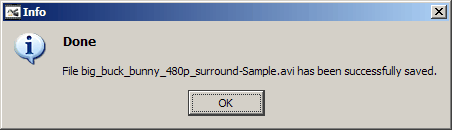
11. Sample is Done!
12. Finished files, note much smaller size of the Sample file.

Makes sense? I sure hope so, enjoy AviDemux. 
There is one problem though: AviDemux is not able to create a sample video for every kind of video format. We will clarify this in the next chapter of this howto.
To the next chapter: ![]() Other software for creating video samples
Other software for creating video samples