


FTD - Viewing and storing spots
Page 3/6 of this article
In this chapter I will explain how to view spots in FTD. This chapter contains the following subjects:
Lay-out

I'll start with a short explanation of the layout and everything we see in the main view. At the top of the screen we see a wide bar containing thirteen large buttons. These buttons represent the most important functions of the FTD program, give information or are links to other parts of the community.
Below this bar on the left hand side we find the search function. This function allows us to search for spots by title, spotter or tags. Directly below the search function we find the category filter. The picture above shows the standard configuration but later on in this manual I'll explain how to adjust this filter.
Below the category filter are the status and rating filters located. These filters allow us to filter spots with a certain status or rating from the spot lists. (Note: at the bottom left corner of the screen the current version of the program is displayed. In this case: FTD v3.7)
In the middle we find the most important part of the program. This is the place where the spots will be shown. Since we didn't update FTD no spots are shown yet. This middle part of the program consists of two (or three) tabs. The Overzicht tab (overview) gives an overview of the complete spot list. Let's start and update FTD to see which spots are available. To do so, click on the 'Updaten' (Update) button.

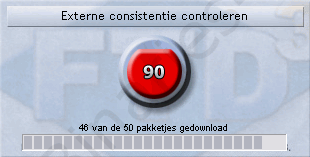
The spinning logo in the top right corner indicates that FTD is working:
And then a notifiction that it has finished:
In the category filter a number appeared behind each category. This value is the number of new spots meeting the criteria of that particular filter.
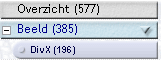
Also we notice a difference in background colors of spots. A green background color means that the spot is new in the database whereas a blue one tells us that the spot was retrieved in a previous update but has recently been updated.
Viewing spots
As an example in this tutorial I will use a spot of the Binaries4all tutorial about FTD.

If we click on the spot it opens in a new tab (the third tab) and the spot information is shown. The tabs can be opened independently of each other so we can easily switch between the spot and the overview. If we open other spots, we'll see they will be opened in this same tab. By right clicking on the tab it will close.
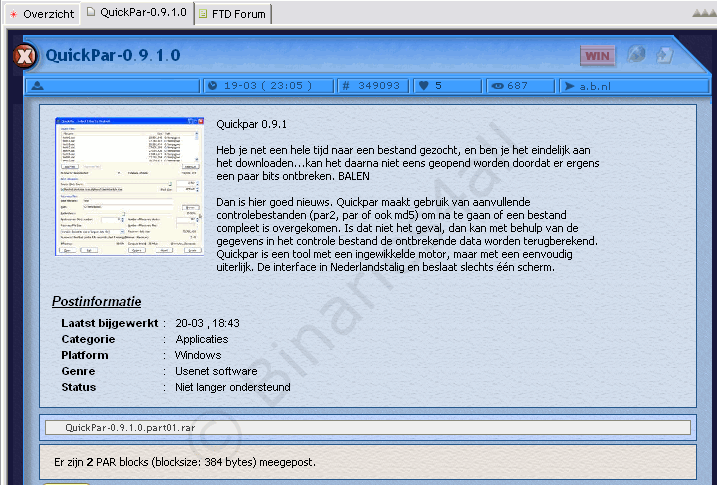
I'll give a short explanation of what we see. Top to bottom:
- Title bar – Status icon, title, spot type icon, web link, direct link to powerFTD (optional), a button to add this spot to our Watchlist (more about this later on).
- Information bar – Poster, date/time, FTD number, received kudos, number of views, newsgroup.
- Announcement – Usually a spotter uses this space to announce when the spot will start. This bar is only visible if the status is 'announced' and will disappear if the status changes.
- Spot information – All kinds of information about the spot. A picture, some text written by the spotter and the automatically generated spot information.
- Files – The filename and the number of files is displayed here.
- Par information – Information regarding the PAR(2) repair files which may be posted along with the spot.
- Messages – A small forum for users to leave a message.
| Messages tab – If the number of messages is greater than the maximum per page, multiple pages will be created. | |
| Edit message – Available to the spotter of the message (up until 1 hour after spotting) and moderators (always). | |
| Delete message – Use this button to delete your own message. | |
| Quote message – Use this to quote another message. | |
| Reply – Reply to a message. | |
| Report this message to a moderator. |
Sort messages
In FTD it is possible to sort the message in the spot forum. Click on the icon directly left of the first message.
![]()
A window appears with several options to sort the messages.
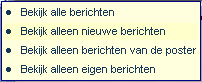
When you select one of these options, only the messages meeting that criterion will be showed. This way you could view the messages of the spotter only, for example.
Bekijk alle berichten = view all messages
Bekijk alleen nieuwe berichten = view only new messages
Bekijk alleen berichten van de spotter = only view messages of the spotter
Bekijk alleen eigen berichten = only view your own messages
Downloading spots
Maybe you wondered where the button to download a spot is located. Well, this is a common mistake: you can't download with FTD. For this purpose you should have a newsreader installed on your PC. If this sounds really vague to you, I suggest you'd read the Introduction for beginners on Binaries4all and pick a suitable newsreader from our overview.
In FTD you can find the filename and newsgroup of a spot, which is useful to find and download the spot. Often the spotter will give you some other things to search for as well, for example the FTD number.Adding messages
As a user you can leave a message for the spotter to say you will download the spot or to thank him/her. Of course this also is the place to ask questions about the spot.
One way to leave a message is by the 'Bericht toevoegen' (Add message) button at the very bottom of the screen.![]()
A window where we can write our message appears.
The upper part of this window is used for quotes. If we use the quote icon ![]() kthe quoted message will appear there. The middle part is for our own message. By using the tags at the bottom of the screen we can add some markup to our text.
kthe quoted message will appear there. The middle part is for our own message. By using the tags at the bottom of the screen we can add some markup to our text.
By checking the 'Zichtbaar' (Visible) checkbox, we can preview our message in the lower part of the window. Clicking on the 'Preview' button will have the same effect. When you're done writing your message, click on OK.
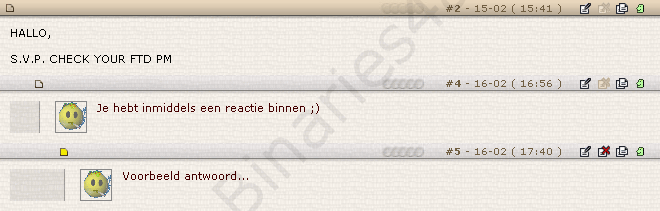
Another way to spot a message is to reply to a message. The window that opens looks very similar to the one described above, only the upper part is colored blue. Replying in this way has the following result. (Note: only if 'threaded view' is activated').
Watchlist
FTD has an option to store spots in a so called 'Watchlist'. By storing spots in your watchlist you can keep track of the status of a spot and create easy access to a spot you might want to view again in the future. To add a spot to your watchlist click on the little arrow in the top right hand corner of the spot.
![]()
Or just click on the little arrow behind a spot in the overview.

To open your watchlist, click on the 'Watchlist' button.
![]()
The watchlist opens and there is the spot. In this overview we see the title of a spot as well as the filename and the newsgroup. This way we don't have to open the spot if we want to download it.
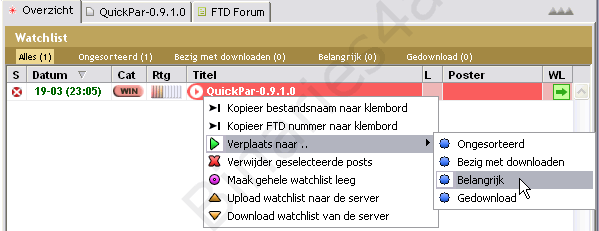
Within the watchlist it is possible to sort the spots. We can give spots a status so we can easily find them. This feature comes in handy when there are many spots in your watchlist. To add a status to a spot, select it by checking the little button in front of it. Then select a status from the drop-down menu and click the arrow to confirm.
Removing a spot from your watchlist is done in a similar way. Select a spot, click on the item with the red 'x'. To truncate your complete watchlist, simply click the X in the upper right corner of the watchlist.
This was all about adding messages and storing a spot. These are the most important functions of FTD you should know about to view and store a spot, and to reply in the spot forum below a spot. In the next chapter we will discuss some more features..
To the next chapter: ![]() Spots: advanced functionality
Spots: advanced functionality