


GrabIt - Configuration
Page 2/7 of this article
When we start GrabIt, we see its main screen, which is shown below.
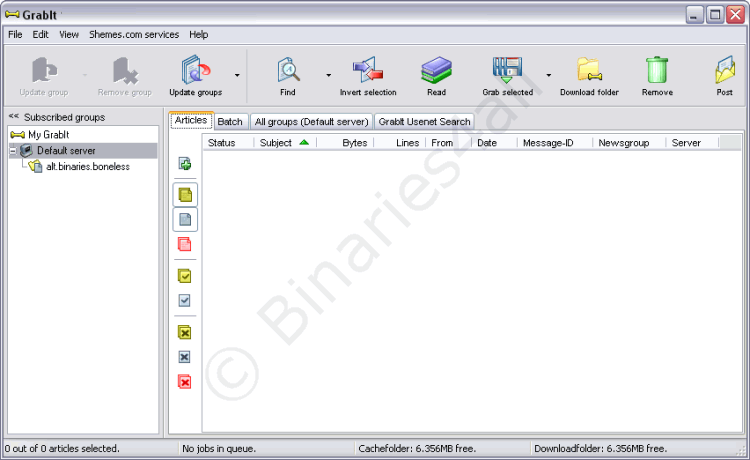
The GrabIt interface has a very simple layout. First we see a row of buttons that allow us to perform the most common actions. Secondly we see four tabs. These give us access to several GrabIt functions that will be discussed later in the tutorial. But let’s start configuring GrabIt first.
Let’s take a look at Edit > Preferences:
As you can see, a window called GrabIt – Preferences pops up.
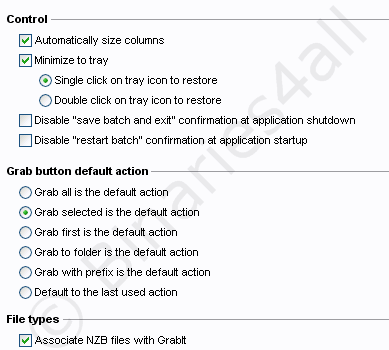
The first tab, called Interface, allows us to configure settings related to GrabIt’s interface.
The settings that we can change here are obvious. As for me, I turned Minimize to tray on, because I want GrabIt to minimize to my system tray when downloading. Disabling the ‘save batch and exit’ and the ‘restart batch’ confirmations has no effect on the download process so I left these unmarked. In the lower part of this tab I selected Grab selected is the default action. This will have GrabIt download the selected files to our default download folder when clicking the ‘Grab’ button. We can also associate NZB files with GrabIt by selecting the corresponding checkbox.
We skip the Visual tab and go directly to the Folders tab.
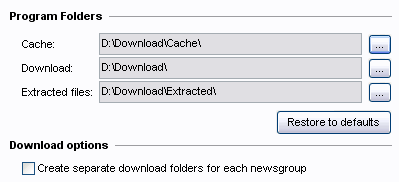
Here we can change the default locations for the cache and the download folder. I left the entries as they were, but feel free to enter your own locations.
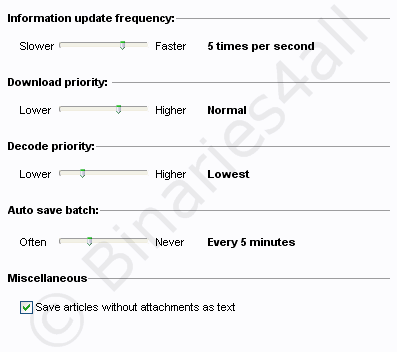
At the bottom you can choose to activate the Create separate folders for each Usenet newsgroup option. With this option selected, a separate folder will be created in our download folder for each Usenet newsgroup we download from. When downloading a post from alt.binaries.boneless, for example, GrabIt automatically creates a folder called alt.binaries.boneless in our download folder. Activating this is a matter of personal preference.Let’s proceed to the next tab, Batch. This allows us to set up the priorities of the download processes.
- Information update frequency : How many times per second information such as download speed and remaining time is refreshed.
- Download priority : Higher: when multiple programs are downloading, GrabIt will use most of the bandwidth.
- Decode priority : Lower: when multiple programs are using your CPU, GrabIt will use less of your resources.
- Auto save batch : Time after which your batch will be saved automatically. In this way you won’t lose your entire batch if your PC crashes.
Next is the Advanced tab. Let’s see what kind of advanced settings GrabIt has.
- Error handling : I unchecked the two options Check singleparts for errors and Check multiparts for errors to prevent GrabIt from giving errors when downloading incomplete files. Automatically retry items in batch makes GrabIt retry any failed files in your batch.
- Incomplete binary handling : This one has to be checked, otherwise GrabIt won’t download incomplete files, and repairing with PAR2 will be very difficult. (Also see the QuickPar tutorial for further information.)
- Automatically check for updates : Defines how often GrabIt checks for new updates.

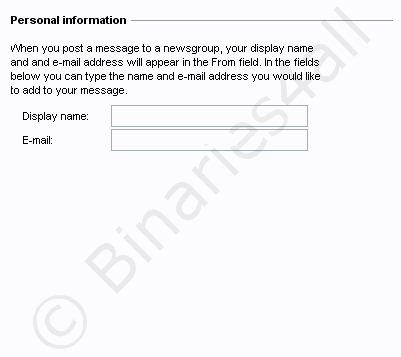
We have arrived at the last configuration tab, Posting. It is possible to post short text messages into a Usenet newsgroup using GrabIt . I recommend using a fake e-mail address to prevent your mailbox being flooded with spam.
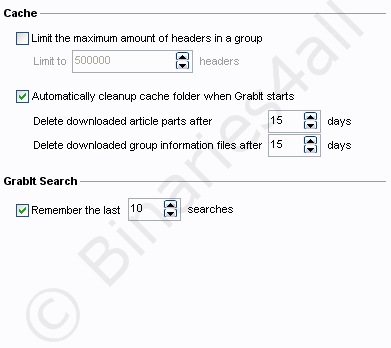
Let's go to the tab History. If you select 'limit the maximum amount of headers in a group' not all headers of a certain group will be fetched, but only the number that is entered in the input field beneath the checkbox. I checked the option 'Automatically cleanup cache folder when GrabIt starts'. I chose to have the files in the cache deleted after 15 days. This is because my payserver has a long retention, and I will possibly want to use older headers as well. This way I don’t have to download them all over again.
The Servers tab tells us how to add a new newsserver, which I will discuss in the next chapter.
Let's proceed to the tab Repair and Extract.
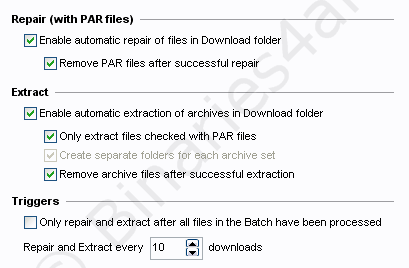
This is a nice tab. Here you can configure GrabIt to automatically repair downloaded files as long as enough PAR2-files are available (enable automatic repair of files in Download folder) and then delete the PAR2 files (remove PAR files after succesful repair). You can also let GrabIt automatically extract the downloaded files (enable automatic extraction of archives in Download folder). Finally GrabIt can automatically delete the RAR files after unpacking (remove archive files after sucesful extraction).
If you have a slow computer you might want to prevent GrabIt from repairing and extracting files when there are other files still pending to be downloaded, because both downloading files and repairing files at the same time might cause your computer to respond slowly. In that case you can check 'only repair and extract after all files in the Batch have been processed'.
To the next chapter: ![]() Adding servers
Adding servers