


FTD - Categories and Filters
Page 6/6 of this article
Now that we know the basics of FTD it is time to look at categories and filters. In the chapter 'Configuration' we skipped the tab 'Categorie filter' (category filter). Here I will explain how this feature works.
This chapter consists of three parts:How the filters work
I will start with a short explanation about how the filters work, because this is slightly different from what most people expect. In FTD there are four categories: Beeld (Video & Images), Geluid (Sound & Music), Spelletjes (Games) and Applicaties (Software). Inside a category you can use filters to hide certain spots from FTD because you are not interested in them. There are a couple of default filters, set in such a way that by default every spot will be shown in FTD.
By clicking on the name of a filter (for example: mp3, minimal bitrate of 160 kbit/s) you will only see spots with those properties. You can also click on the main categories (Beeld, Geluid Spelletjes, Applicaties). Then you will see a list of all spots that belong to one of the underlying filters. So if a spot does not belong to any underlying filter, it will also be hidden in the main category overview. This way you can hide certain unwanted or inappropriate material from FTD entirely.Adjusting default filters
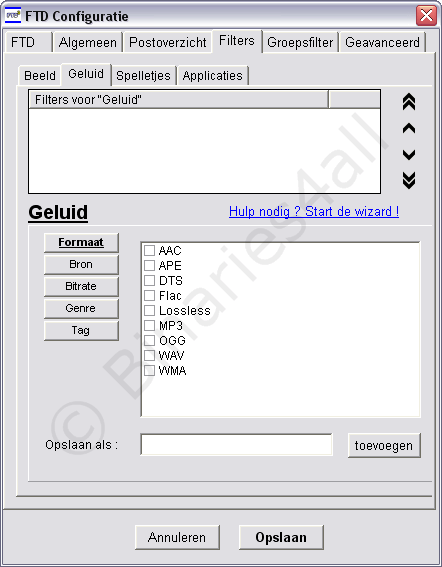
In this section we will adjust the default filters. Click on the 'Config' button to open the configuration panel or click on 'Programma > Configuratie'. Then click on the tab Filters.
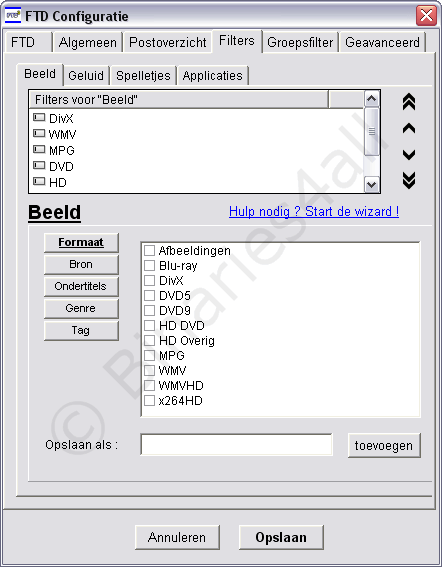
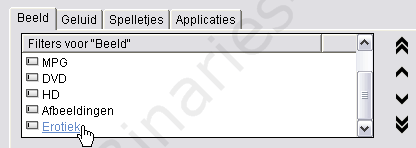
Here we see the category 'Beeld' and a couple of default filters. Two of them have a Dutch name: Afbeeldingen = Images. Erotiek = Erotica. As an example I will show how to adjust the Erotica filter in order to hide certain genres. Therefore click on 'Erotiek':
As you can see none of the checkboxes are checked in the section 'Formaat' (file format / video format), which means that automatically all formats will be shown when viewing this filter. So if none of the boxes are checked, everything will be shown. Of course this is also true when all boxes checked. Having selected the 'Erotiek' filter, now click on Genre. If you would want to hide gay material, deselect those checkboxes, leaving just one box checked:
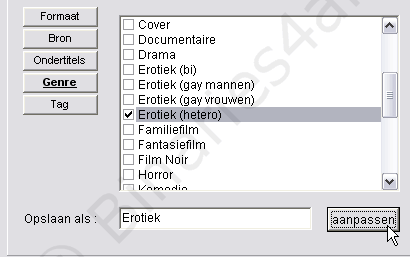
After adjusting a filter click on the 'aanpassen' (save) button to save the modifications. Now we have changed an existing filter.
Remove erotic material
We can also hide/delete erotic material entirely from FTD. Just delete the erotica filter (how to delete a category is explained in the next section) and make sure that the erotica genres are not checked in all other filters of the 'Beeld' category. Then no overview in FTD will show erotic material anymore. The search functionality will also hide it.
Adding personal filters
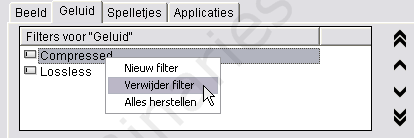
Because you might not be completely satisfied with the default filters of the Sound category you can will define your own filters. So let's first delete all existing filters. To do this, right click on a filter (in this example on the tab Geluid) and click on 'Verwijder filter' (delete filter).
After this we can start creating our own filters. Now that no filters exist, the window looks like this:
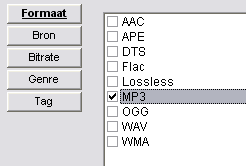
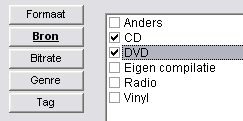
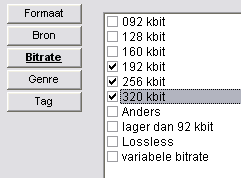
Here we can add our own filters. In this example we will create a filter for MP3 spots where the source (in Dutch: bron) was a cd or dvd, the genre is Dance, and the quality is a bit rate of 192 kbit or higher.
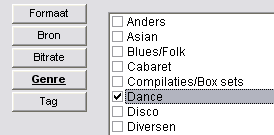
Tip: if you want to select many boxes it is easier to right click on an item and click on 'alles selecteren' (select all).
'Tag' means that we can add a tag to be used for filtering.
![]()
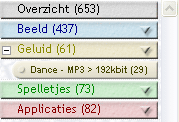
Click on 'OK' to close the configuration window. As you can see the new filter has been added and the old ones have been removed!
If you want to add more filters, repeat the steps mentioned above.
You have reached the end of this FTD tutorial. Now you are finally able to use this very popular Dutch program.